
Here is a tutorial for this very dramatic, gyaru-inspired eye makeup: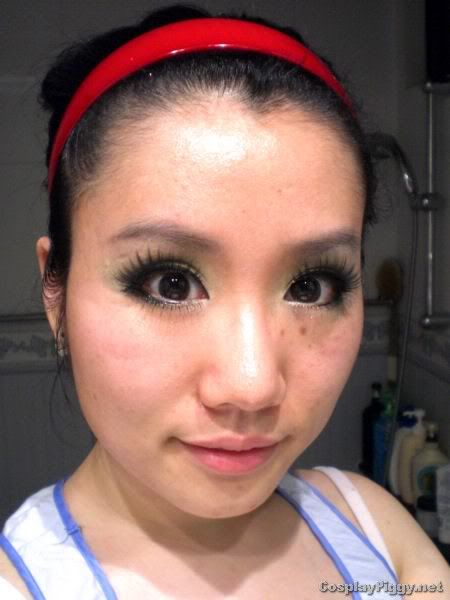
Obviously this is not a everyday look (unless it is your thing :p), and my tutorial is applicable to people with double-lids more, although single-lidders can also do it since eyelid glue is involved.
p.s.: I skipped foundation and my skin looks crappy, I know. Also, thick brows are thick.
Heaviness: 4 out of 5
Skill level: Advanced
What I used:
- Too Faced Shadow Insurance eyeshadow base
- Coastal Scents black gel eyeliner
- Kate eyeshadow palette in GN-1 (the other colors can be used as well)
- Koji Eye Talk eyelid glue (also used as false lashes glue)
- Two pairs of false eyelashes, one top (thicker) and one bottom
- Hypersize Platinum Brown circle lens (optional)
- Four eyeshadow brushes
- Eyeliner brush


Got everything? OK, let's get started! You can click on any of the pics for a bigger version by the way.
As with all makeup, always start with washing and moisturizing your face. Tweeze your eyebrows if you need to.

Wash your hands and put in your circle lenses now if you prefer. I do so because it allows me to see what I am doing.

Squeeze out a small amount of the Too Faced Shadow Insurance eyeshadow base onto your finger; about 5mm or ¼ inch would be enough for one eyelid.

Pat the base onto your eyelids and gently spread until even. Do not rub it in or you would end up wiping off more than you put on. Also put a bit under your eyes along your lashline too.

Pick up an ample amount of eyeliner gel from the pot by dipping the brush into the gel instead of gliding it on top. Scrape off the excess on the mouth of the pot.

Line your top lashline thickly, starting at the inner corners and going all the way to the outer corner, extending the line slightly downwards at the end. We are going for a dramatic look so don't be afraid to be heavy-handed.


Pick up more eyeliner gel and line your lower lashline starting from the outer corner and going 2/3 of the way in, leaving the inner 1/3 bare. Make sure the line is thicker towards the outer corners and taper off to a point towards the inner corners.


Apply the middle color in your eyeshadow palette to your whole eyelids, stopping just under the highest part of your browbone.


Use another brush to apply the second-darkest color to the outer half of your eyelids, following the shape of your eyesockets (the "crease"). Lightly press on your eyelids to find out where the hollow of your eyesockets are. Wing the shadow slightly at the outer corners, and blend well.


Pick up the darkest color in the palette and draw a sideways "V" along the deepest part of your eyesocket at the outer corners. Blend slightly upwards and outwards.


Put the darkest eyeshadow along your lower lashline too, and blend outwards and slightly downwards.


Apply the lightest color shadow (not the glitter gel!) to the inner corners of your eyes, forming another sidewards "V", and also on your browbone.


Re-apply the eyeliner so it is clean and defined.


Now it is time for the eyelid glue. Remember to do it one eye at a time! Apply a curved thick line of glue above the natural crease of your double lids, or slightly below the top part of the eyesocket. Wait for it to dry completely, then apply a second layer. Do not open your eyes fully or your lids will stick together weirdly!


Use the stick that came with the glue to form your new, wider double-lid. It is kind of hard to explain how to, so watch this video instead. Repeat with the other eye. Notice that my eyes look significantly larger than before I use the glue. Without the glue, the thick eyeline almost completely hide my natural double-lid.


Now it is time to put on the top false lashes. Apply a thin line of the eyelid glue onto the ridge of the lashes, and let them dry out a little bit by blowing lightly on them.Put the lashes above your own eyelashes, and hold them in place until the glue dries.


Repeat with the bottom lashes, and you are done!


A few more camwhoring pics for good measure:


Just for shits and giggles, I took off my circle lens and took a pic, you can see that they do make quite a difference:

I hope you enjoyed this tutorial, and have fun!


No comments:
Post a Comment